
Onboarding & Infrastructure
Unlike standard SaaS tools where your data shares space with thousands of other users, ClawbotPro operates on a Single-Tenant Architecture. When you onboard, the platform physically deploys a dedicated, isolated AWS environment (Virtual Private Cloud and Compute Instance) exclusively for your workspace. This ensures absolute data sovereignty, zero shared compute, and SOC2-ready isolation.
This guide walks you completely through the registration, payment, and 4-step infrastructure deployment pipeline.
Registration & Plan Selection
The journey begins with securing your account and selecting your infrastructure limits.
1 Sign Up (/auth/sign-up)
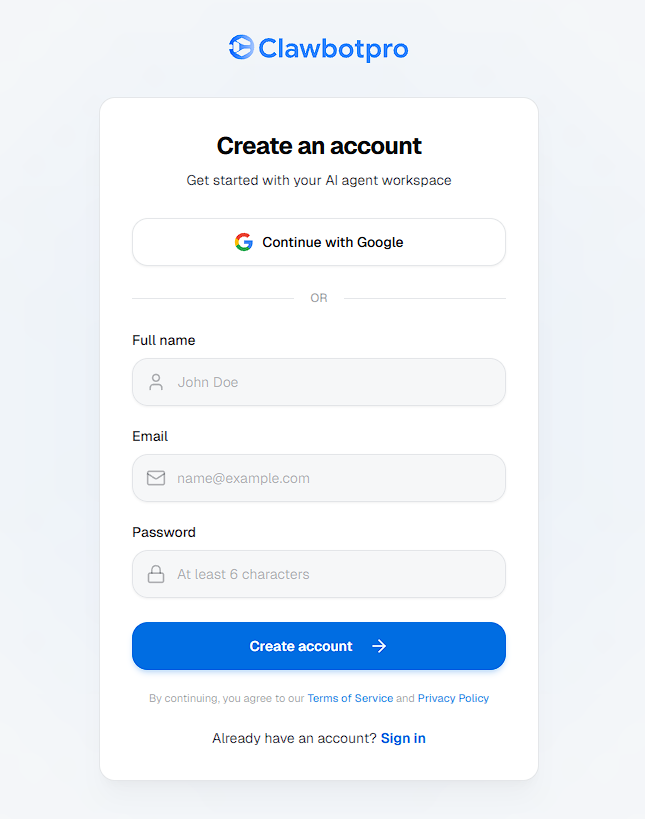
Register using an email and password or a single-sign-on (SSO) provider like Google. A secure Supabase session is instantly established for your identity.
2 Pricing & Payment (/pricing)
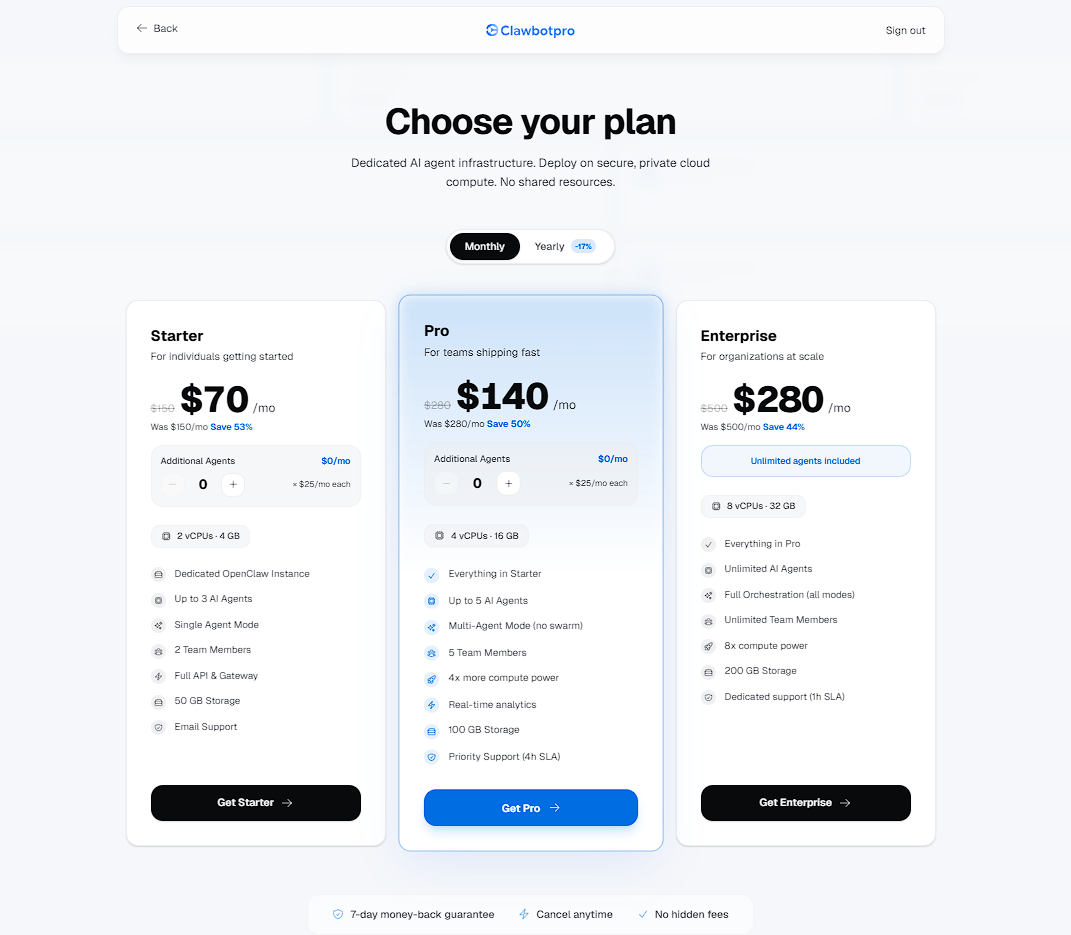
You are then prompted to choose your operational tier (Starter, Pro, or Enterprise). Each tier corresponds to a specific hardware capability on AWS. For instance, the Pro tier provisions an AWS t3a.xlarge instance with 100GB of storage. Payments are securely processed via Stripe.
3 Order Confirmation (/pricing/thank-you)

Upon successful payment, your workspace is officially minted in the database, and you are routed to the Thank You page. From here, you enter the automated Infrastructure Onboarding flow.
Step 1: Launching the Environment
Post-payment, the system lands you at /onboarding. Clicking Launch Environment triggers a CloudFormation deployment sequence in AWS.
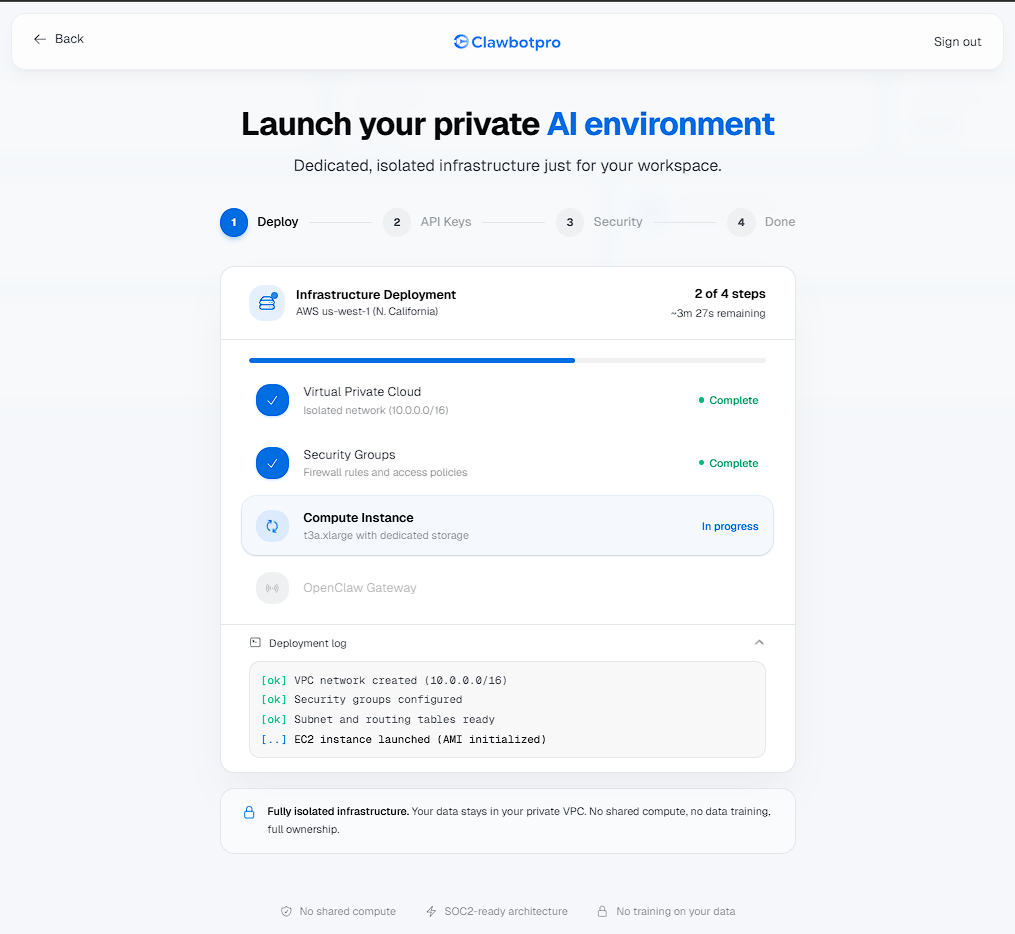
- Virtual Private Cloud (VPC): Creates an isolated
10.0.0.0/16network so your agent's traffic never touches the public internet during internal execution. - Security Groups: Establishes strict firewall rules, closing all inbound ports by default.
- Compute Instance: Provisions a dedicated EC2 instance tailored to your tier to handle local code execution and vector memory processing.
- Live Deployment Logs: You can watch the real-time installation logs stream in the UI as the OpenClaw Gateway daemon boots up. This usually takes 3 to 4 minutes.
Step 2: Connecting AI Providers
ClawbotPro agents utilize a "Bring Your Own Key" (BYOK) model. During this step, you securely connect API keys from providers like OpenAI, Anthropic, Google, and Groq.
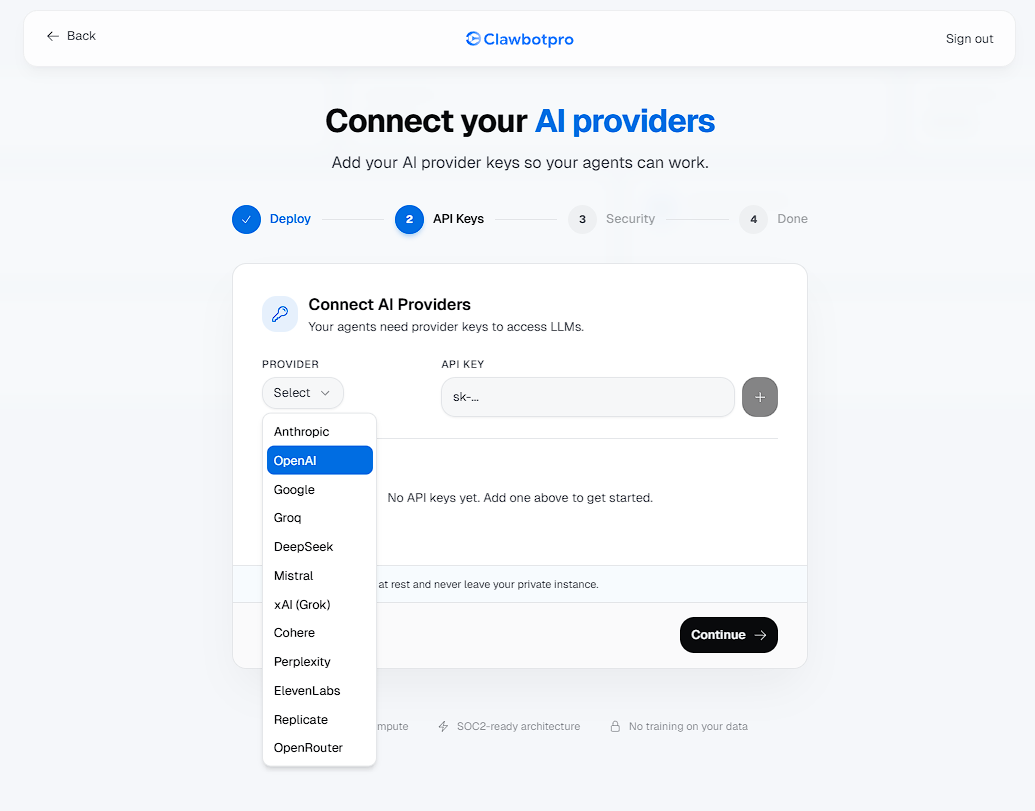
These keys are encrypted at rest. Crucially, they are synced directly to your newly provisioned private instance. The central ClawbotPro dashboard does not process API requests with these keys; they are injected locally into the OpenClaw Gateway on your node to execute ReAct loops securely.
Step 3: Securing Your Gateway
Because your instance is fully private, the ports required for the OpenClaw WebSocket Gateway (18789) and remote Web UI Terminal (6080) are blocked globally. You must explicitly whitelist trusted IP addresses to connect your UI to the node.
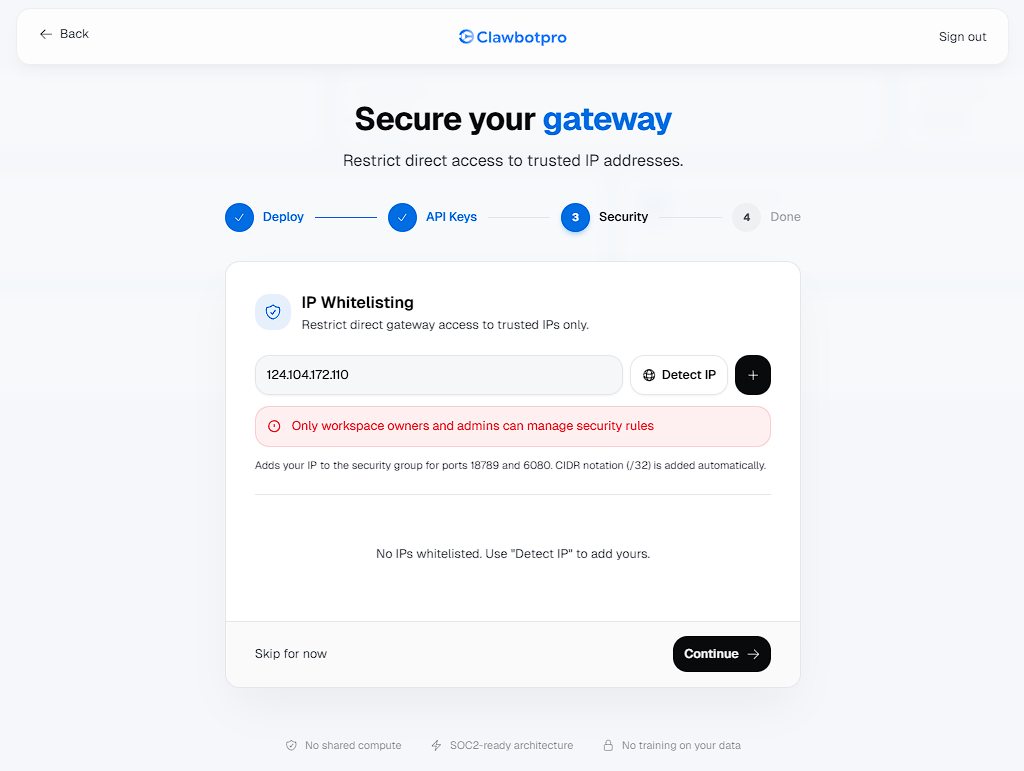
Using the Detect IP button automatically grabs your current public IPv4 address and injects it into the AWS Security Group using CIDR /32 notation. Only Workspace Owners and Admins have permission to modify these security rules.
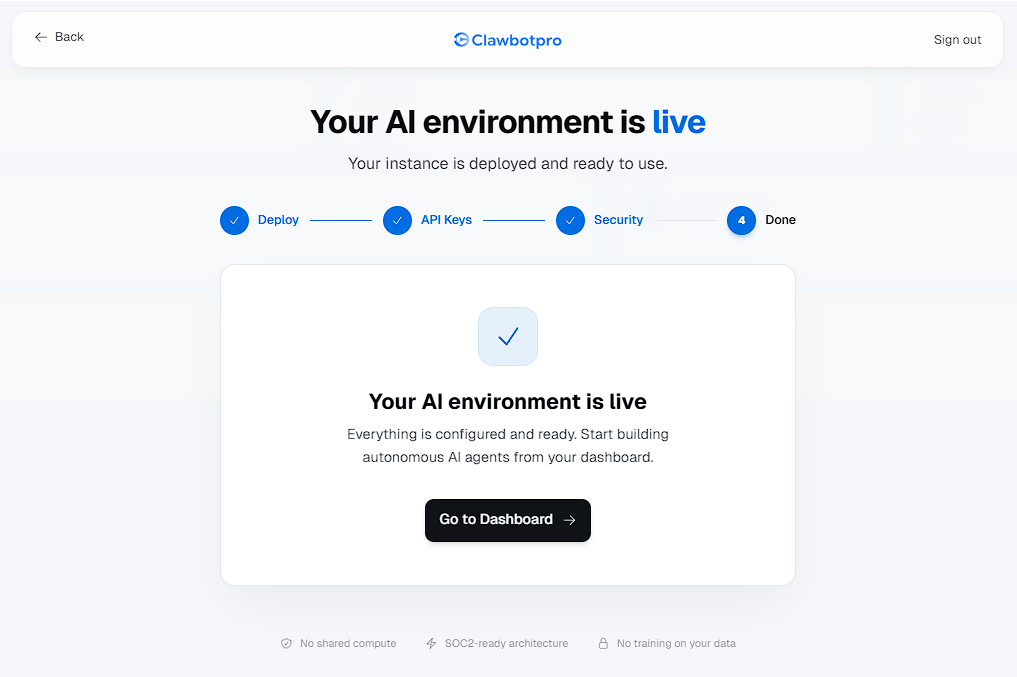
Step 4: Completion & Infrastructure Access
Once security is configured, the setup finalizes. You are greeted with the "Your AI environment is live" prompt, linking you directly into the main Mission Control workspace.
Post-onboarding, you can monitor the real-time health of your dedicated compute at any time by navigating to /dashboard/instances in the sidebar.
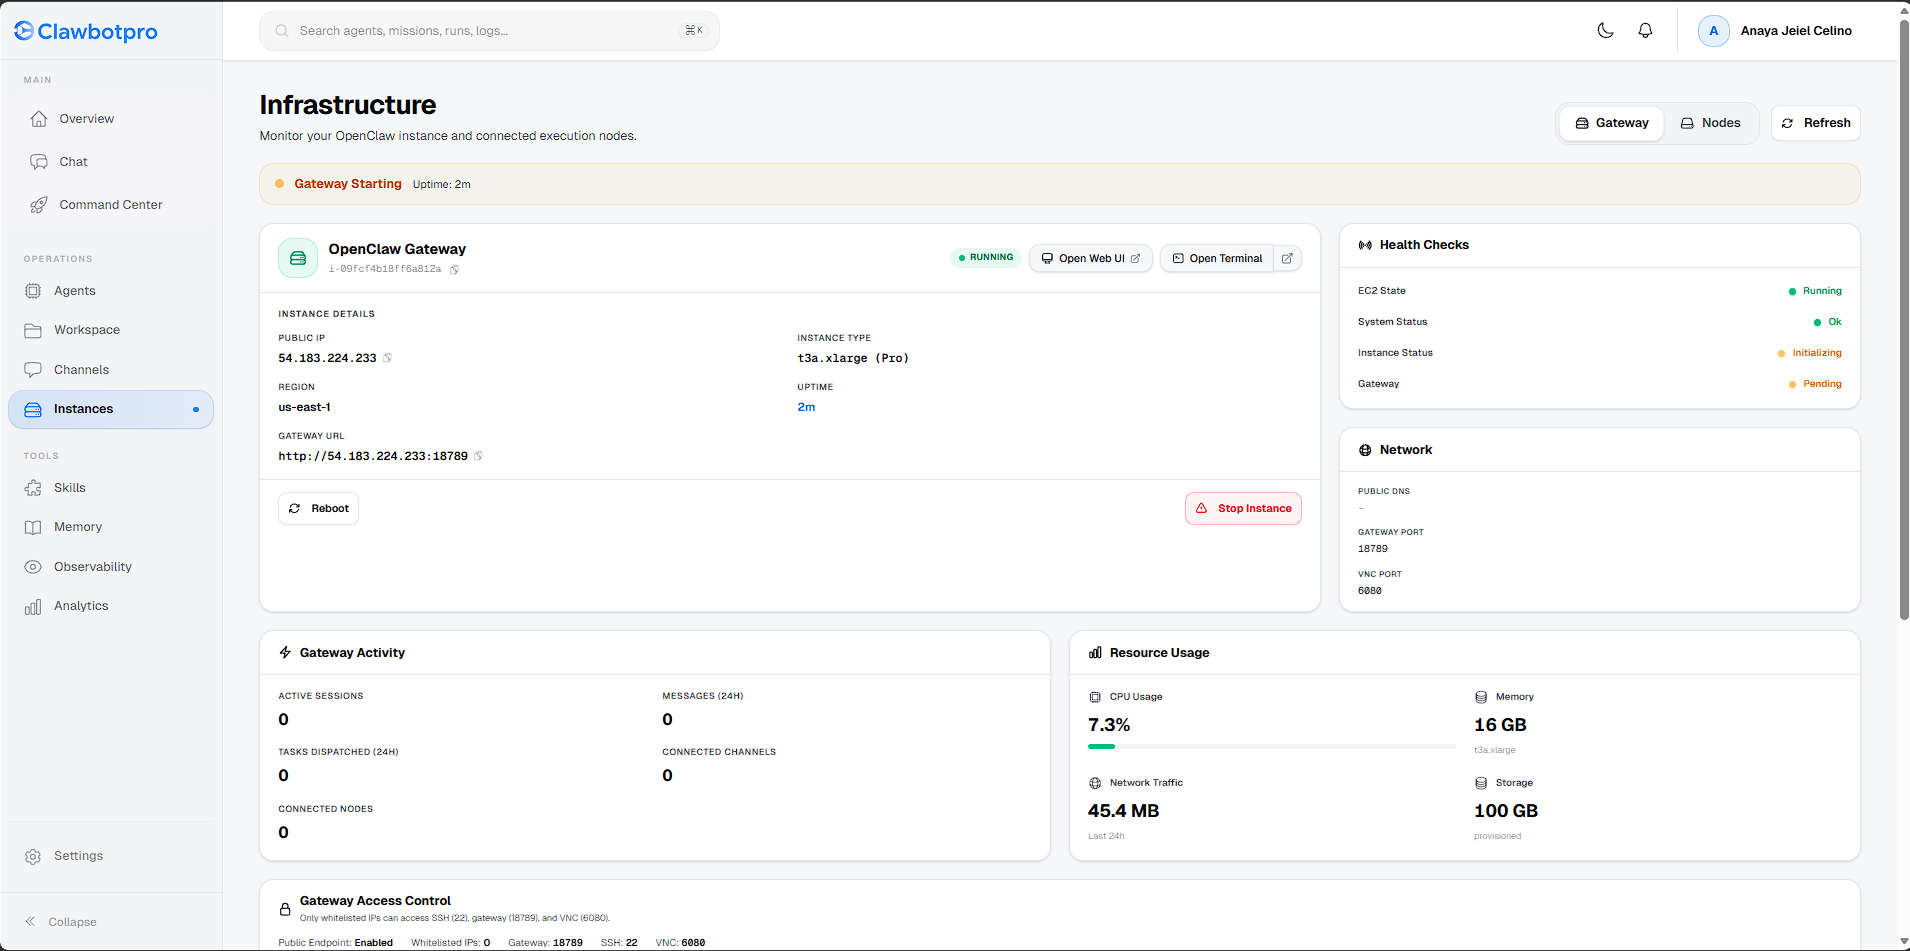
- Instance Details: View your assigned Public IP, AWS Region, and the direct Gateway URL. You can also perform hard reboots or stop the instance directly from here.
- Resource Usage: Real-time tracking of CPU, Memory, Network Traffic, and Storage provisioning to ensure complex web scraping workflows avoid OOM (Out of Memory) crashes.
Next Steps
With your private environment successfully booted and secured, return to the Overview page to create your first AI agent. It will instantly connect to this new node and be ready for deployment.